So you’ve decided to take your PC gaming experience to a new level and enjoy a more immersive virtual world with an awesome new gaming headset. It’s a definite step up from your computer’s built-in speakers and microphone. You can finally look forward to a rich, natural audio reproduction and clearer communication with your fellow gamers. But for all their supposed simplicity, connecting a gaming headset to your PC can be complicated. Perhaps the mic on your PC’s webcam is hijacking your audio output, or some additional drivers need to be installed. This should be simple, but sometimes it isn’t. Not to worry; we’ve put together a few steps to take when connecting your gaming headset to your computer.
1. Check the PC’s Physical Audio Output
The first step is locating your computer’s audio ports and making sure they are not physically damaged. If you’re using a laptop, the audio-out ports will typically be located on the sides or the front. Desktop PCs, on the other hand, may have these ports on the front or back of the CPU box. There are three main types of PC audio ports and which one you use will depend on the connectors of your gaming headset. These are:
3.5mm Universal Serial Bus (USB) 3.0 High-Definition Multimedia Interface (HDMI)
Let’s take a closer look at each one so you can understand how the connections are made.
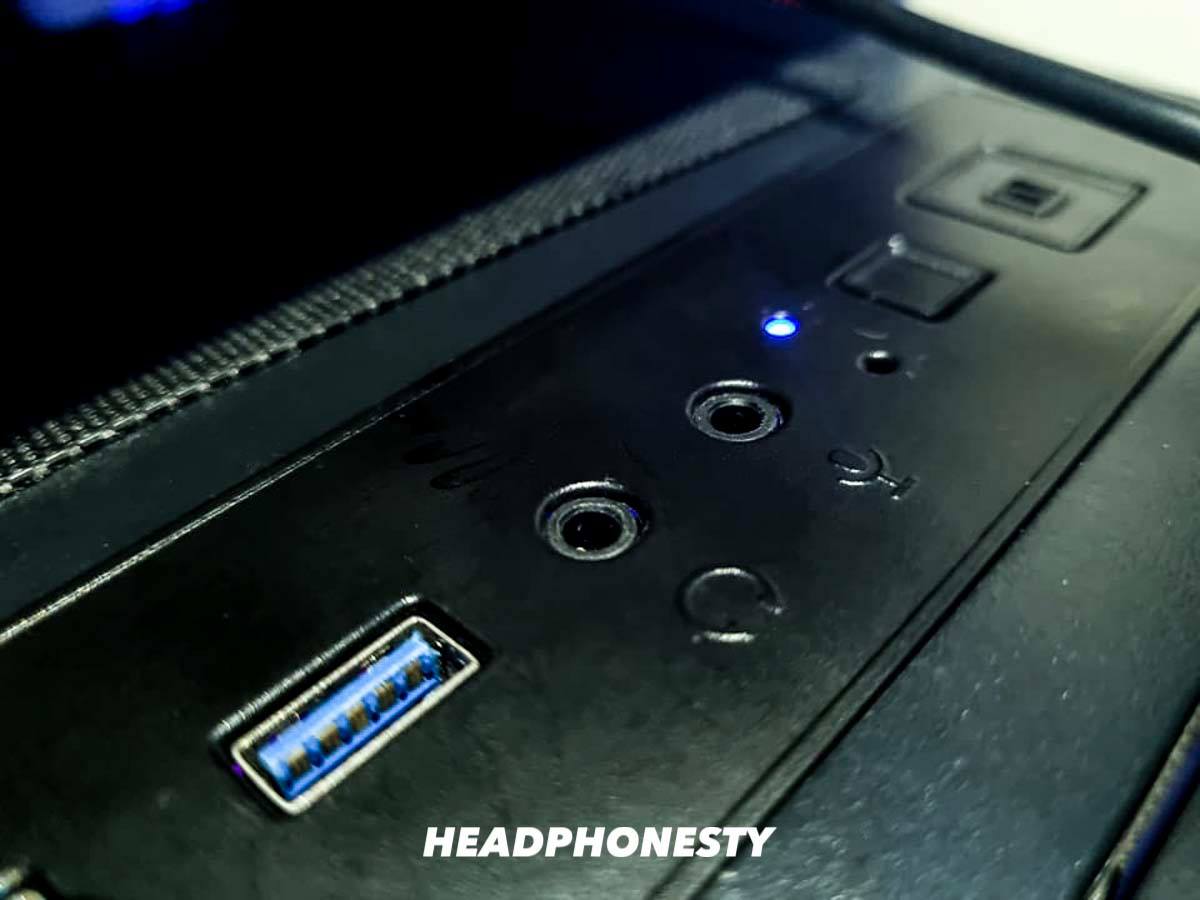
3.5mm Audio-in and Mic Ports
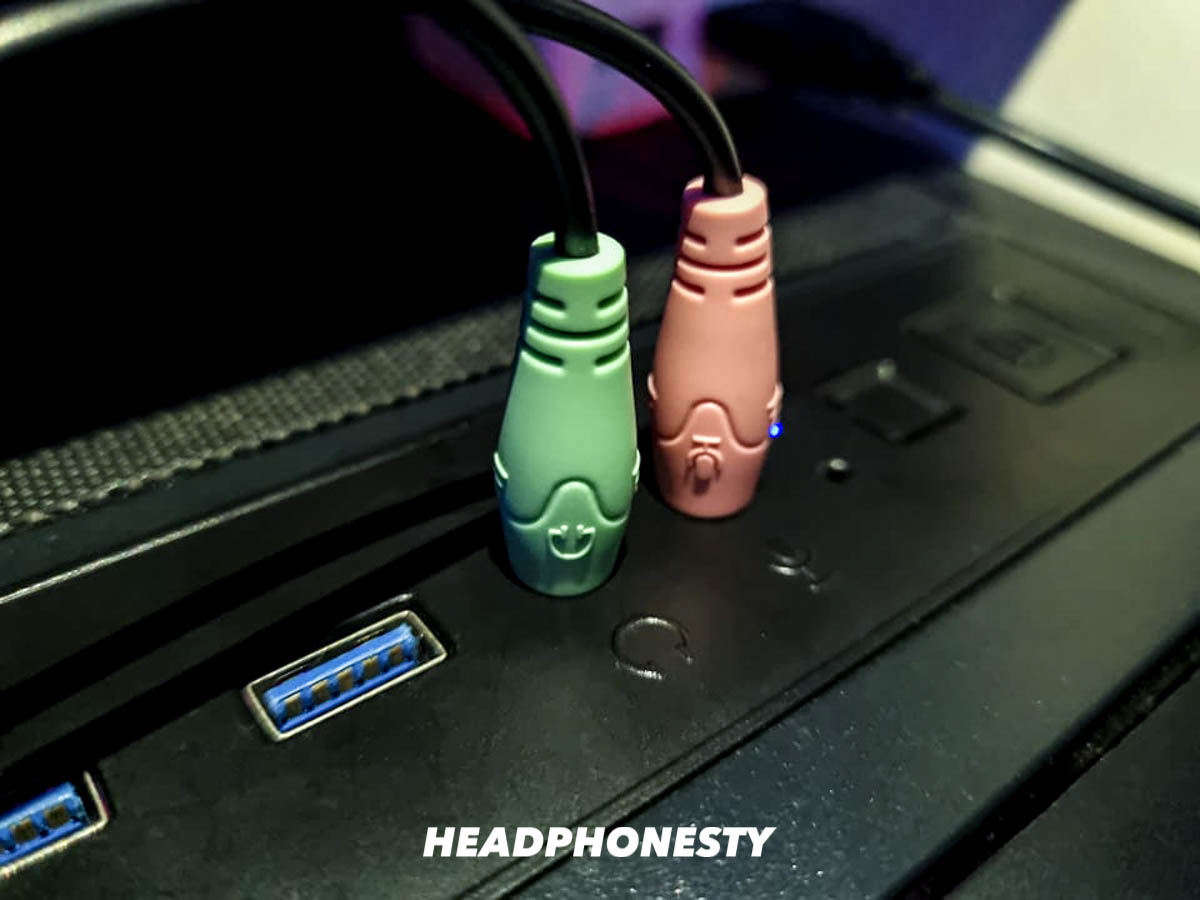
These are the ports to use for wired gaming headsets with 3.5mm Jacks. This headphone jack belongs to a family of electrical connectors used for analog audio signals and is typically known by other names like audio jack, phone jack, and aux input. Gaming headsets that use 3.5mm jacks need two audio ports – mic input and audio output (pictured below). Note the color differences between each port. Your gaming headset should have corresponding colored connectors so you know which plug goes where. Some laptops don’t have color-coded ports. So instead, look for an image of headphones next to the audio-in port and the image of a microphone next to the microphone input.
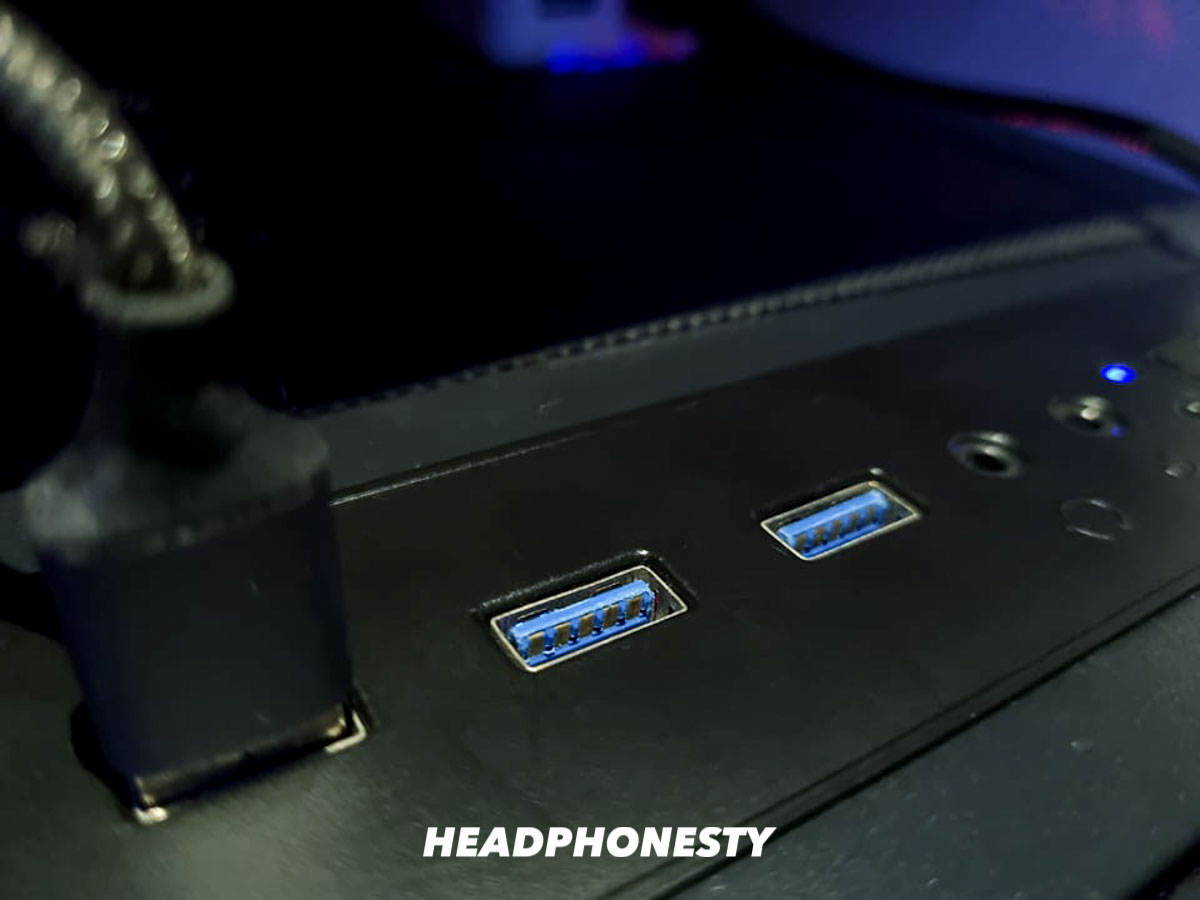
USB 3.0 Port
Also known as SuperSpeed USB, the USB 3.0 is a specific generation of USB ports designed for faster transfer rates and better power efficiency. The location of your USB 3.0 on your computer will depend first on the age of your computer. If your computer was manufactured before 2008, then it won’t have a USB 3.0 port. Other than that, the USB port locations tend to vary from computer to computer, but you’ll normally identify a USB 3.0 by the blue color of the plastic inside. USB 1.0 features a white plastic color inside while the USB 2.0 is black. USB-powered gaming headsets usually offer enhanced experiences thanks to inline amplifiers and simple controls.
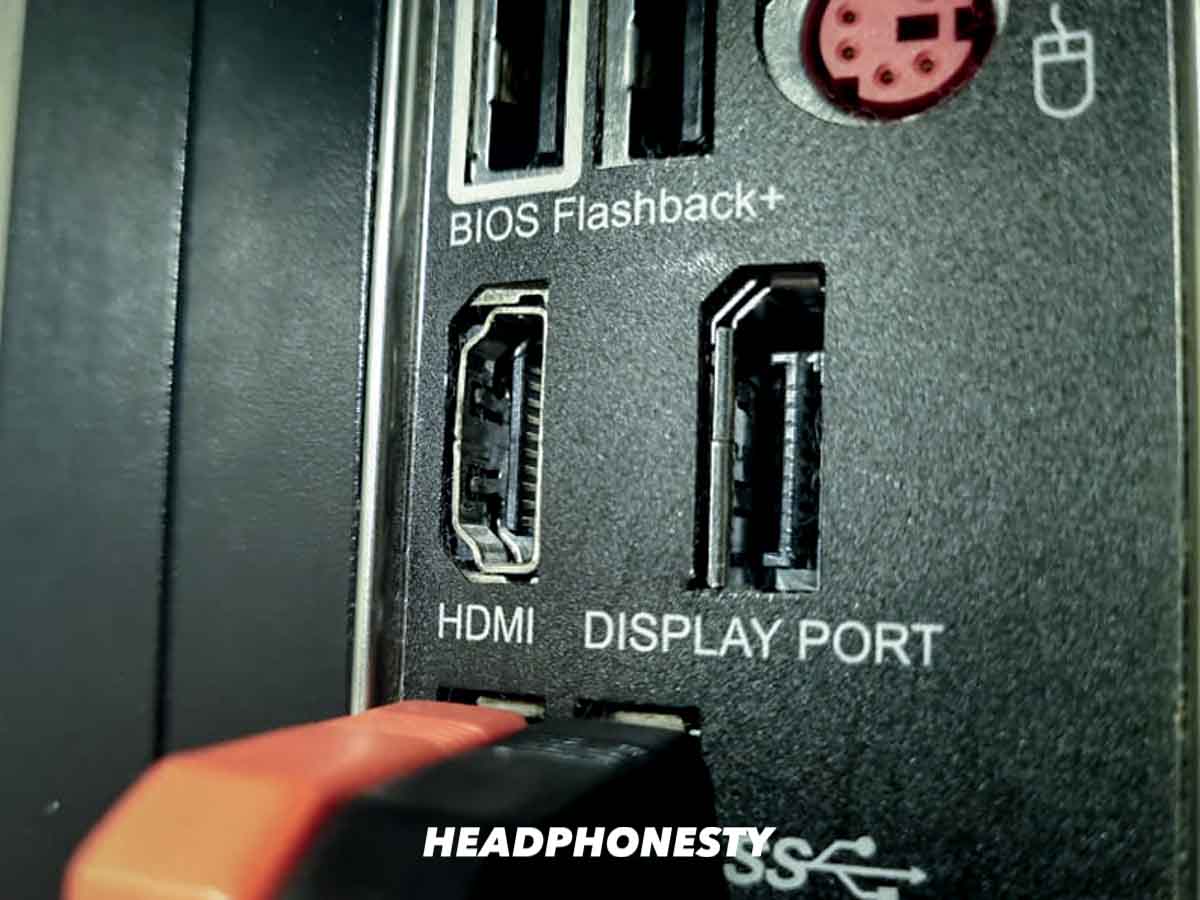
HDMI Port
An HDMI cable transmits both digital video and audio signals between electronic components. The connection point for this cable is the HDMI port which can typically be found on the back or sides of laptops, or the front or back of desktops. At first glance, it may look like a USB port, but you’ll notice the angled edges and flatter appearance. Plus, there’s usually “HDMI” written beside it. 2. Select Universal Serial Bus controllers in the Device Manager window. 3. Locate the USB port by its type (e.g. 2.0, 3.0, 3.1). If there aren’t 3.0 or above ports, then it means your computer is not USB 3.0 enabled. The pins in the port are capable of transmitting high-definition (HD) video and up to eight channels of digital audio.
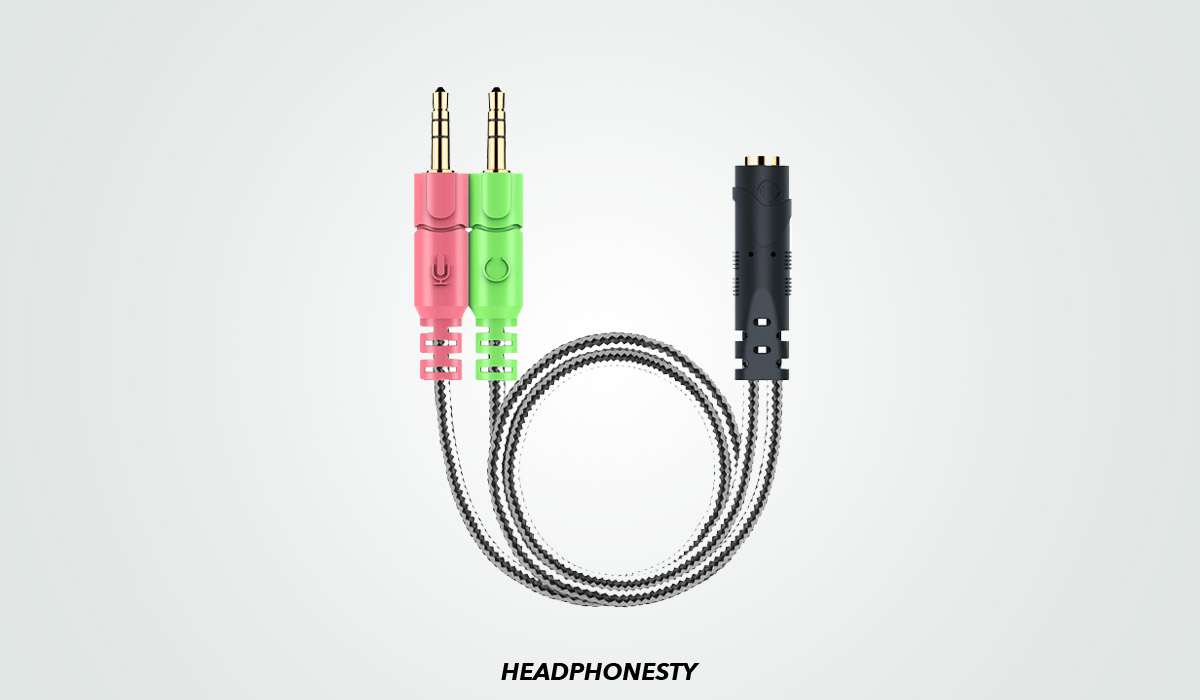
2. Check the Gaming Headset Connectors
For example, if your headset has only one 3.5mm jack, then you can get a 3.5mm Jack Headphone Splitter that lets you “split” the jack into the distinct headphone and mic jacks. Or perhaps your headset comes with the newer USB Type C and your computer doesn’t have the right port. You can get a USB-C to 3.5 mm Headphone Jack Adapter as a solution.
3. Plug the Connector Into the Port
Make sure you double-check that you have the right ports matched, otherwise you could cause some damage to your equipment.
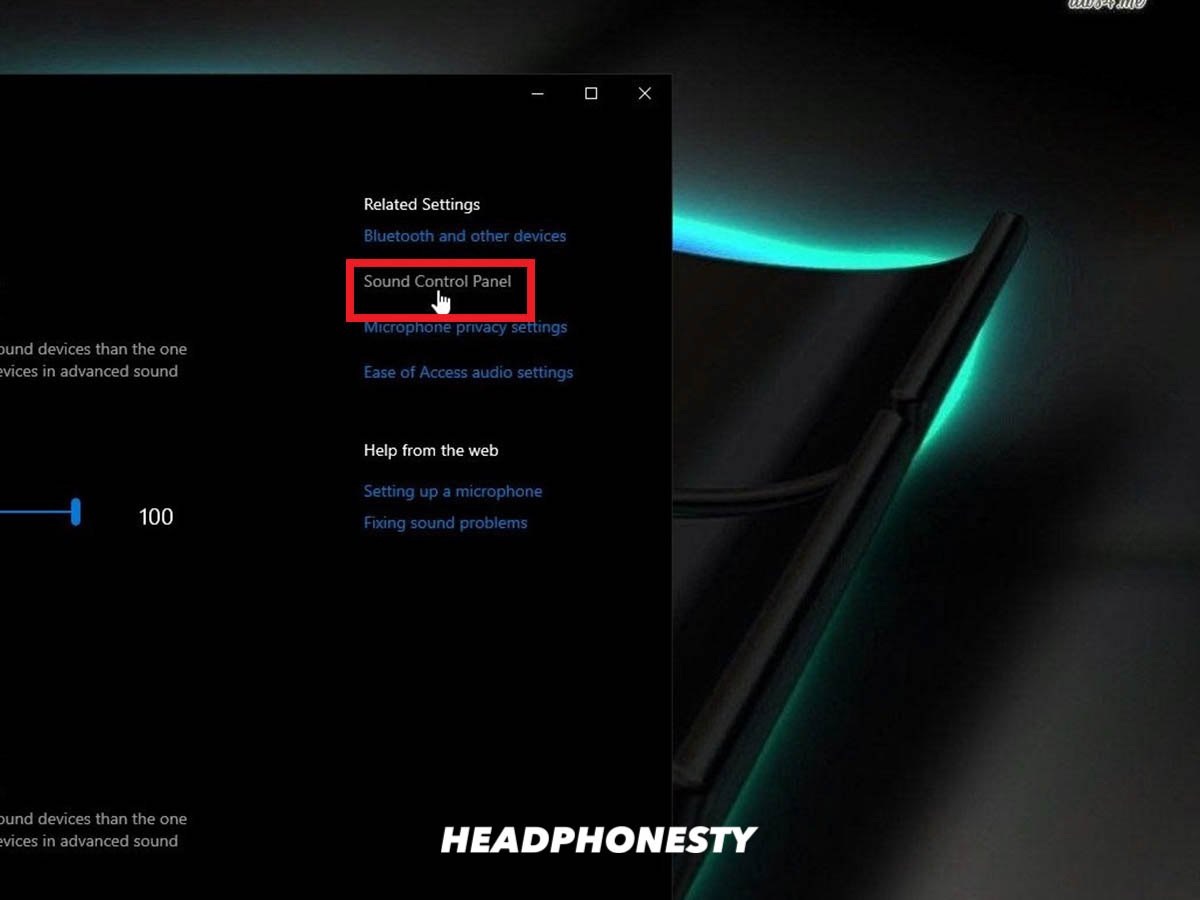
4. Configure Sound Output on the PC
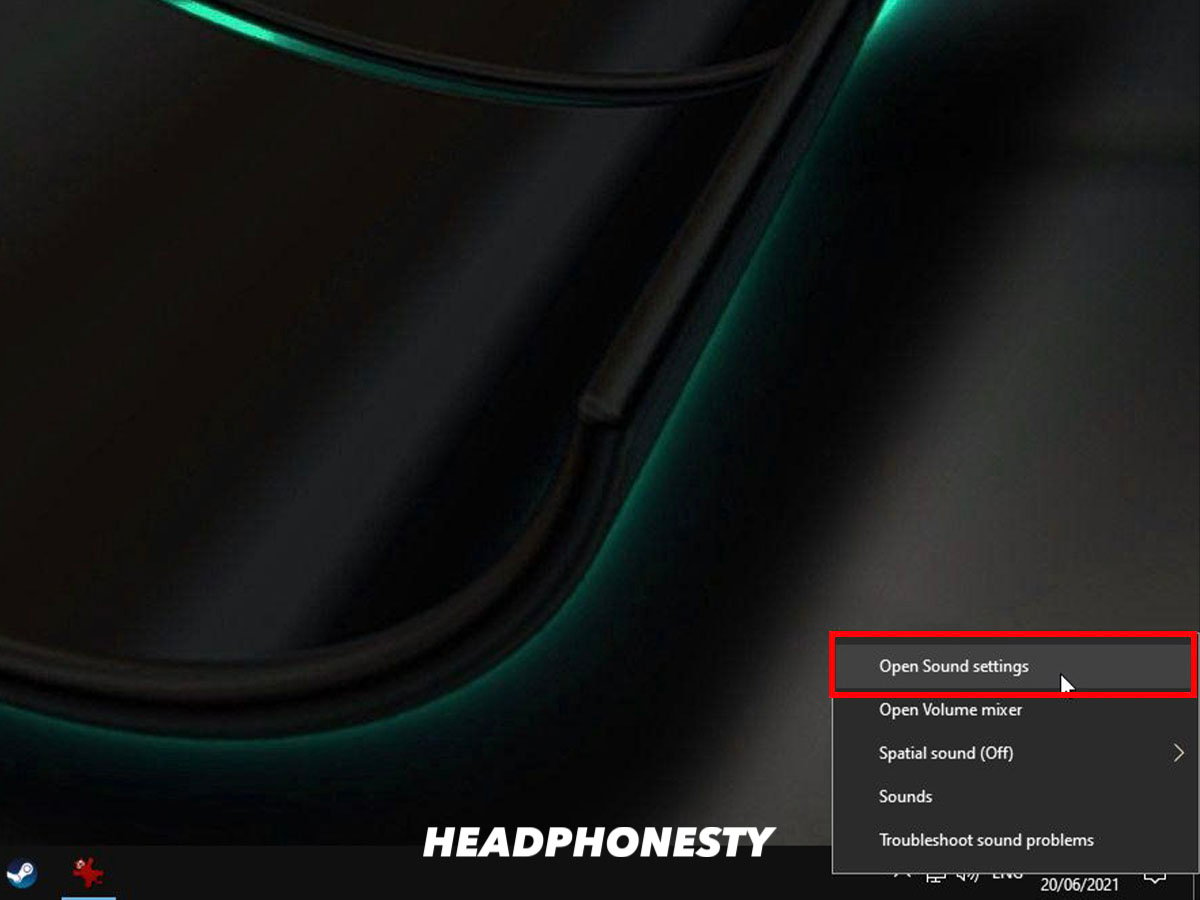
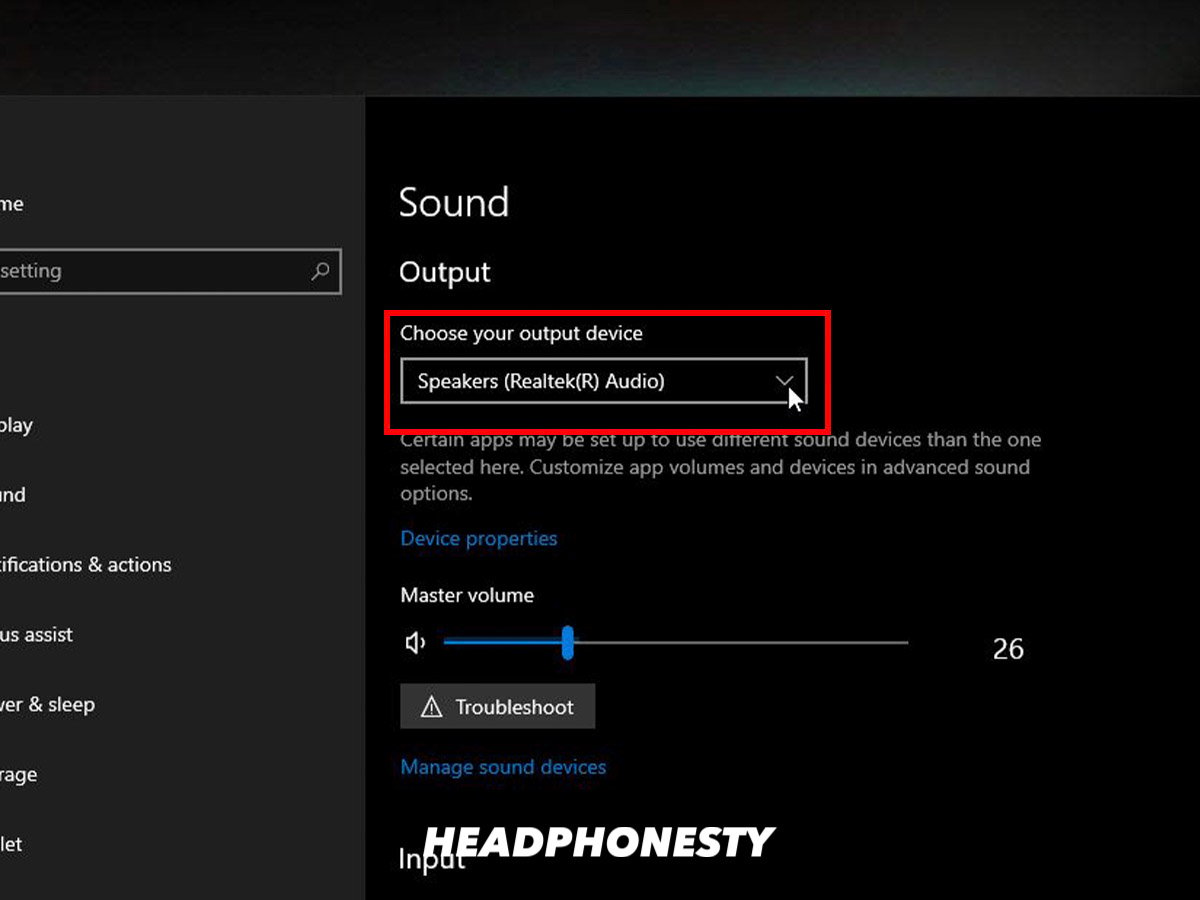
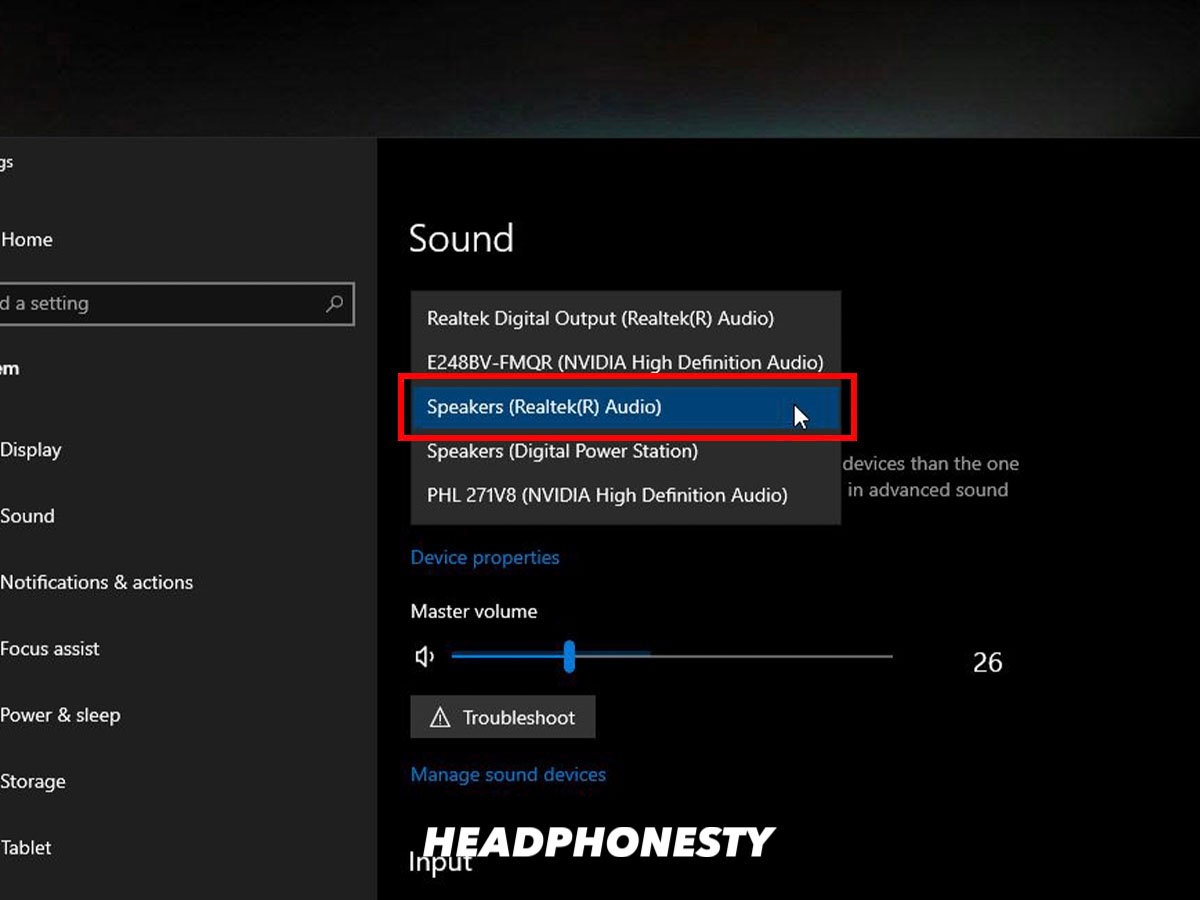
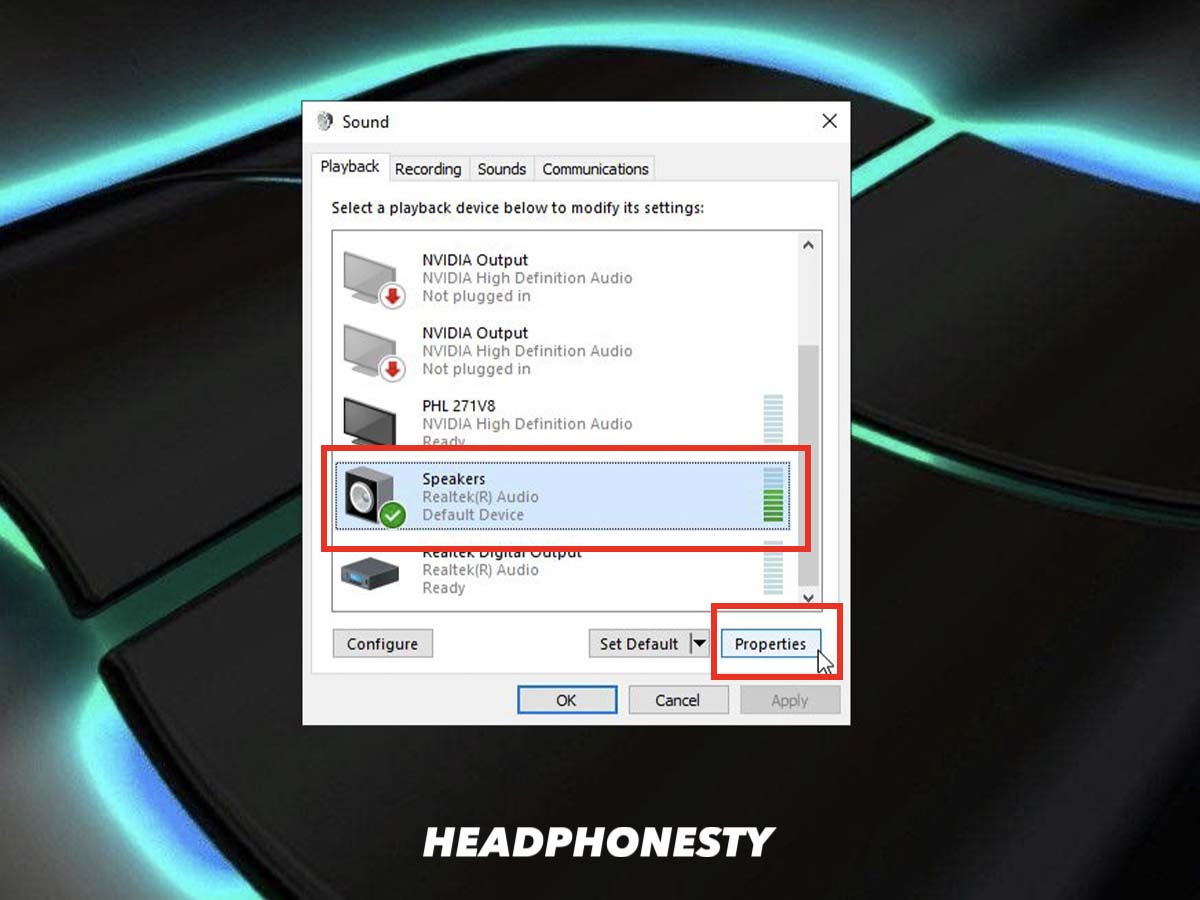
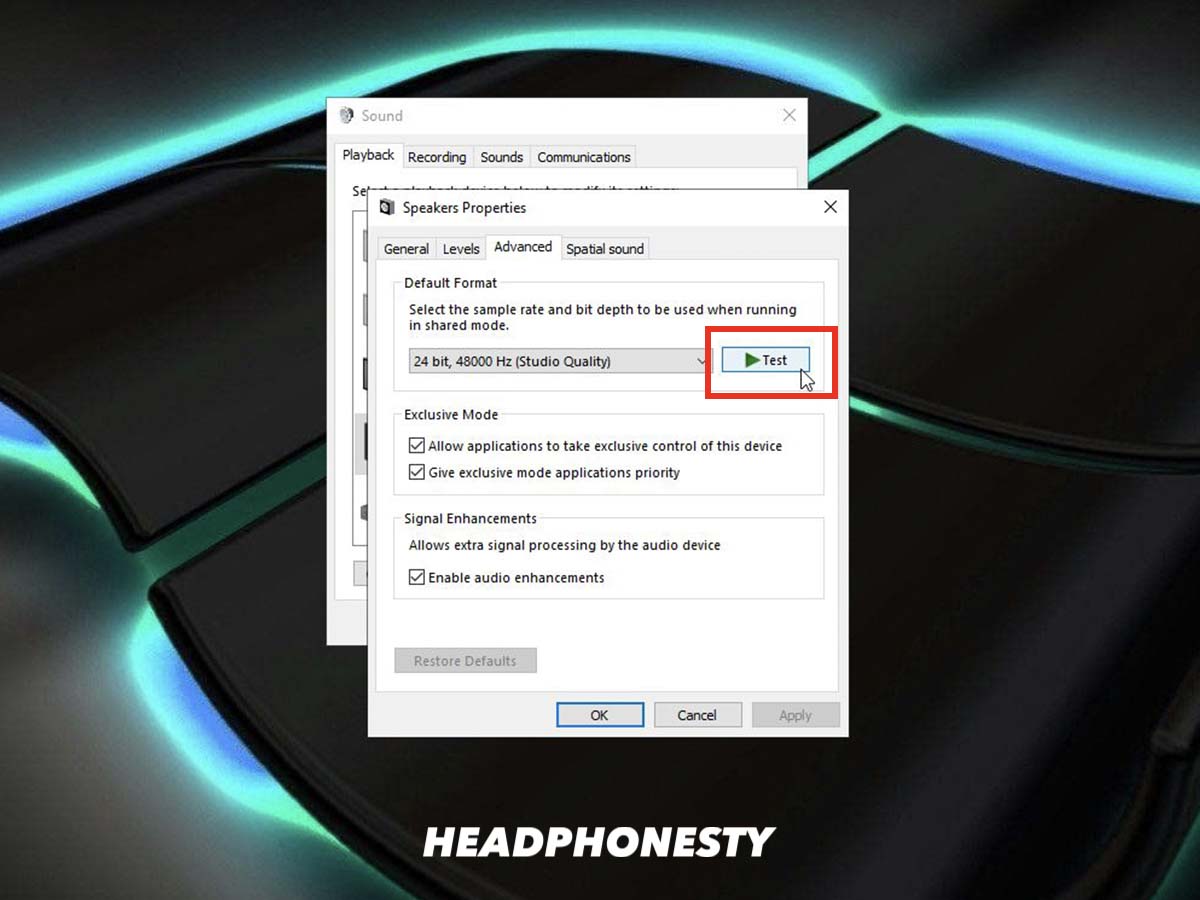
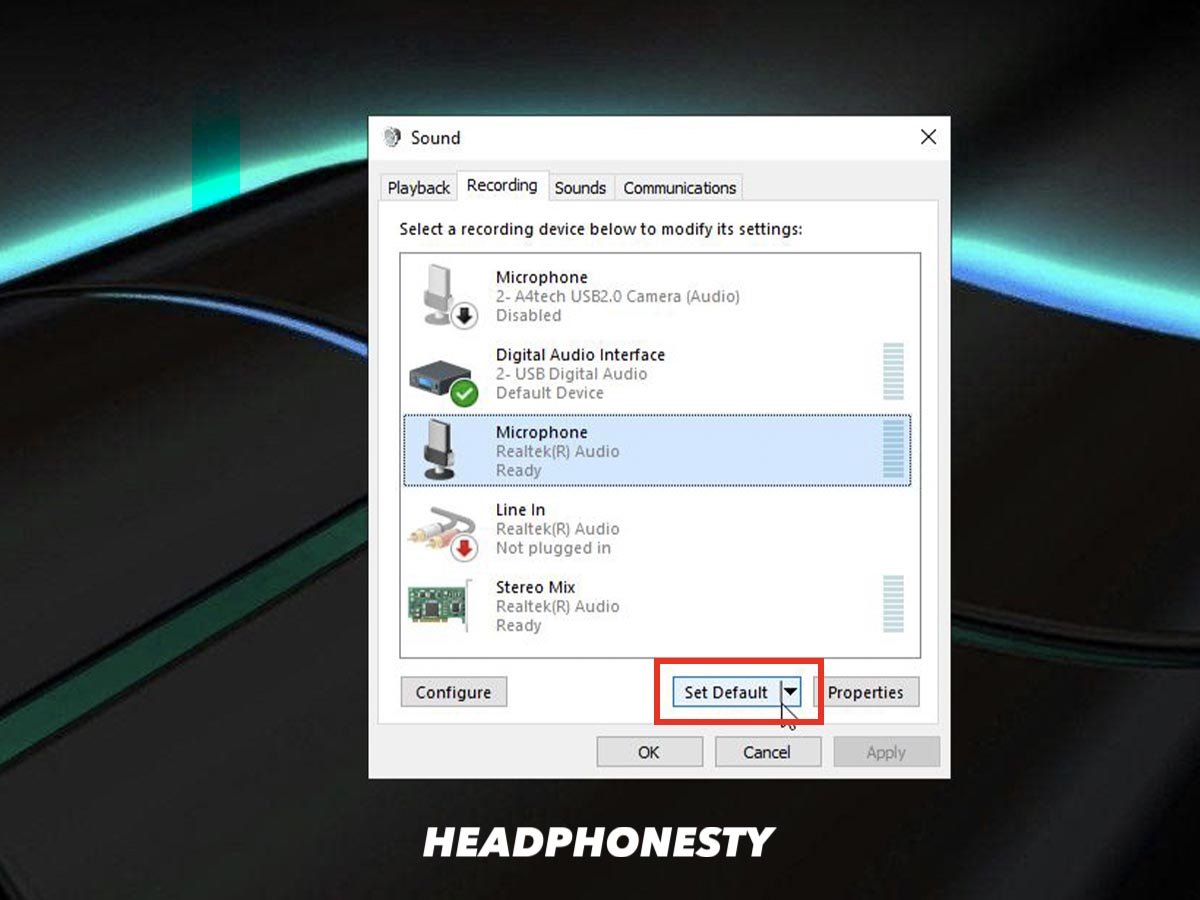
Once you have connected your gaming headset to the PC, it’s time to make sure the sound levels are configured properly for the connected device. If there’s no sound coming from the headset, then you’ll need to manually configure it. First, check to see if your PC has the headset selected as the default audio output device. To do this: Play music on your PC again to see if the sound is coming from the headset. If not, then you’ll need to test the output to make sure you’ve selected the correct device and that it works as it should. If you’ve chosen the correct device selected for sound output, then you should hear sound through the headset.
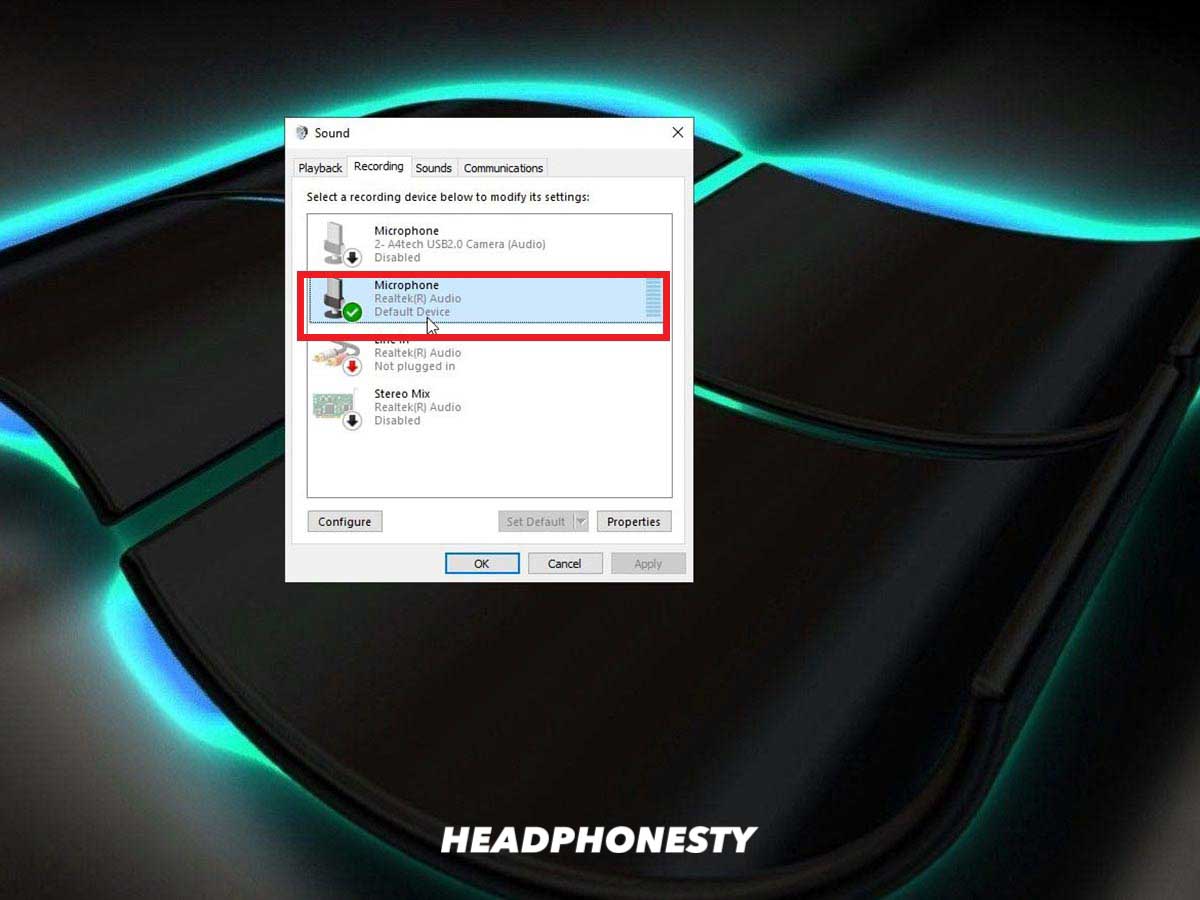
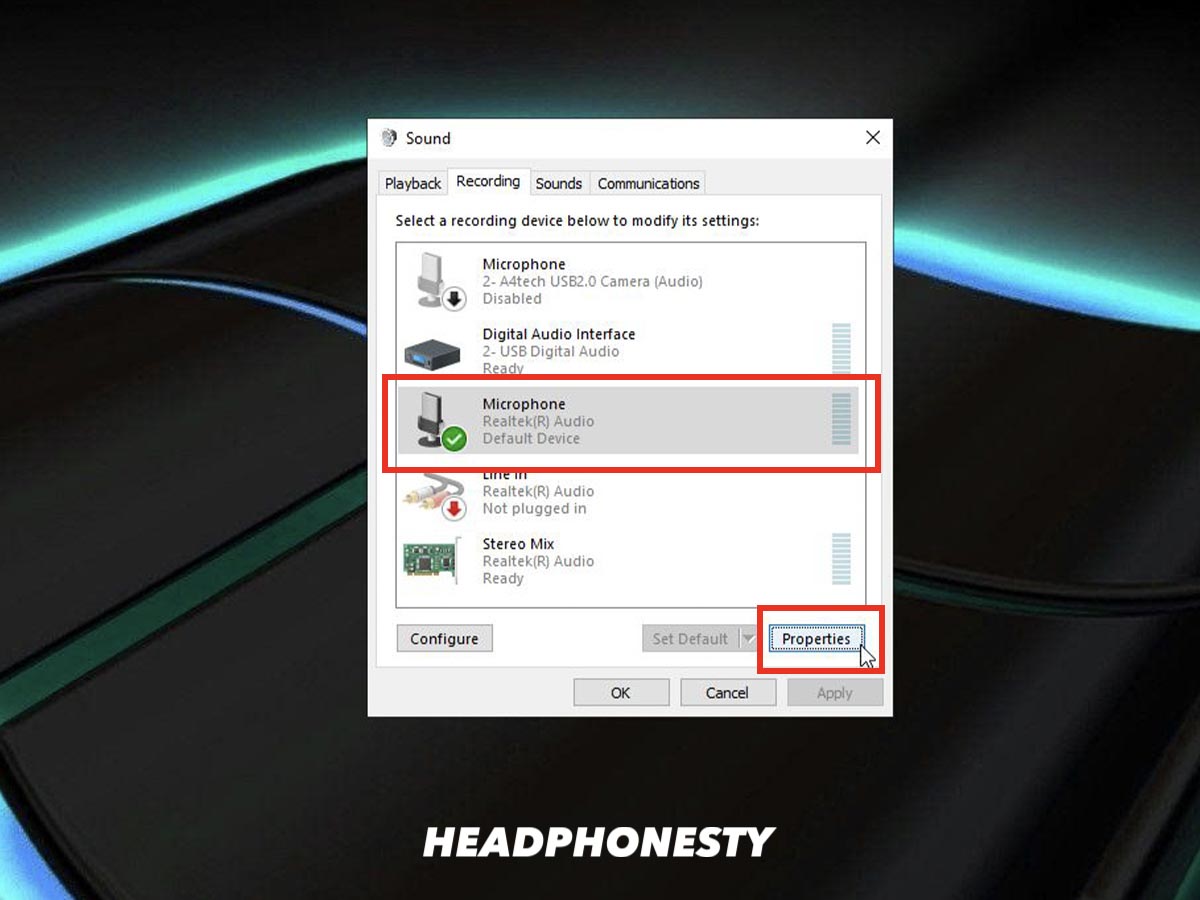
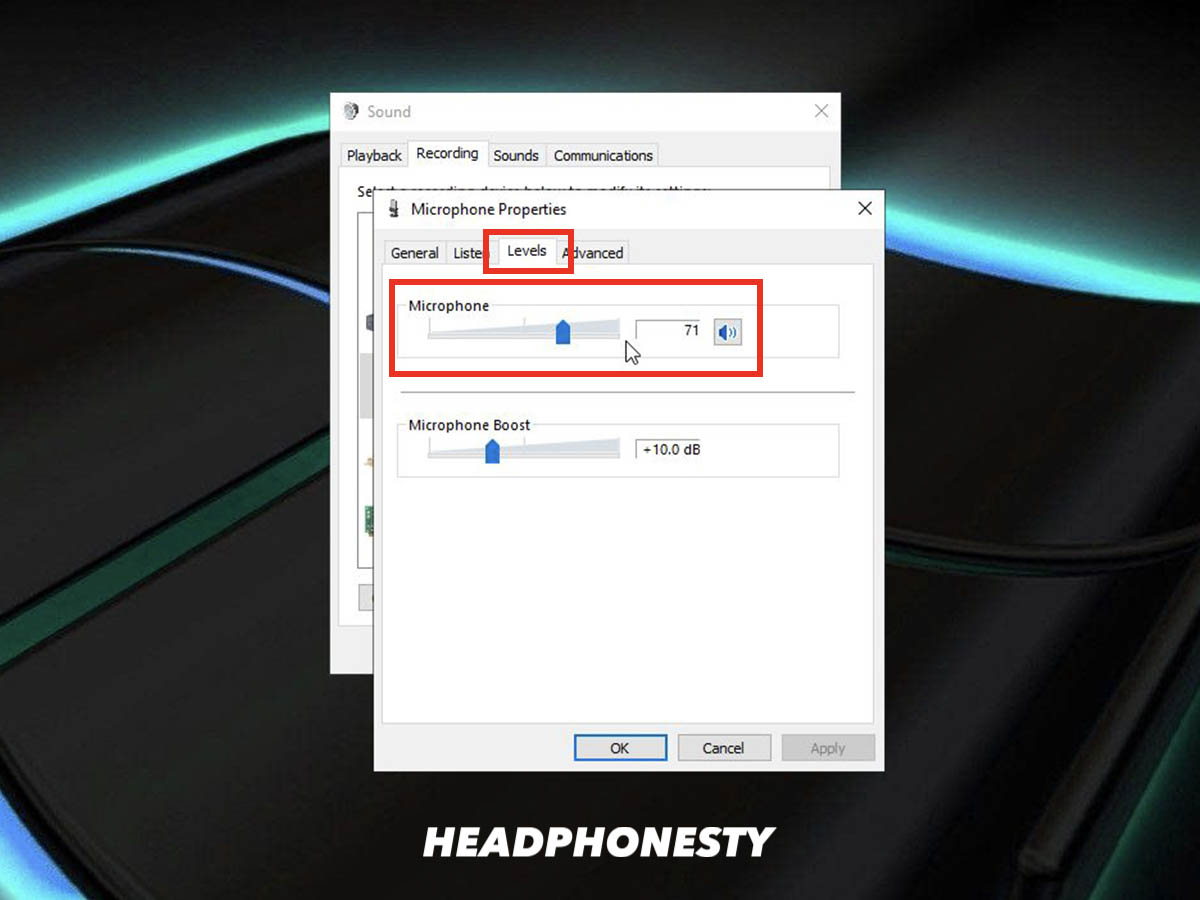
5. Do a Mic Check
The next step is to make a voice recording to confirm that the mic is working. Again, this might configure automatically once you’ve plugged in the headset, but in the case that it doesn’t, then we simply run through similar steps done for the headphones. Once configured, give it a test run by checking the clarity of your mic. The goal is to know how your communication will sound when you’re actually gaming.
Troubleshooting
Having problems connecting your gaming headset to your PC? Here’s some quick troubleshooting tips to consider before calling technical support:
Make sure you use the right ports
Check that it’s plugged in and that you’re using the correct port(s).
Re-install the drivers
Sometimes the problem is with the drivers. Go to your Device Manager and uninstall the drivers for your headset. Restart your computer and reinstall the drivers.
Reset the physical connection
Unplug the headset connector from the computer port and plug it in again.
Make sure you’re not muted
If you can’t hear your voice recording during the mic test, it could be that the headset mic was set to mute. Check the controls and the volume to make sure they’re set for use.
Charge before using
If your gaming headset is battery powered, make sure it’s charged before connecting it to your PC.
Connect to a different device
If the above steps are unsuccessful, then connect the headset to another computer and test it out. If it functions correctly, then the problem is with your computer. On the flip side, if it does not function correctly, then the problem is likely with the headset.
Conclusion
Now you should be all set to team up with your squad and take down enemies with your PC gaming! Got any other questions about setting up your gaming headset with your computer? Leave a comment in the comments section below.